
The Letter “O”
Words that Begin with the Letter “O”
- oak tree
- oar
- oatmeal
- obey
- object
- oboe
- observe
- obsidian
- obstacle course
- occupation
- ocean
- ocelot
- o’clock
- octagon
- octave
- October
- octopus
- odd number
- ode
- odor
- off/on
- office
- officer
- oil
- oink
- okay
- old
- olives
- Olympics
- omelet
- once
- one
- onion
- onyx
- ooze
- open
- opera
- operation
- opinion
- opossum
- opposites
- option
- orange
- orange juice
- orangutan
- orchestra
- orchid
- Oreo
- organ
- origami
- ornament
- orzo
- Oscar the Grouch
- o-shaped cereal
- ostrich
- otter
- ounce
- out
- outer space
- outfit
- outside
- oven
- over
- overalls
- overcoat
- owl
- ox
- oyster
- President Obama
Arts and Crafts

O-Shaped Cereal Necklaces
You can use any cereal that is circular shaped, like Cheerios, Fruit Loops or Apple Jacks. Although the Fruit Loops will give you more options as far as colors. Supply your children with o-shaped cereal and yarn, string or wire. Have the children thread the cereal onto the yarn to create a necklace.
O-Shaped Cereal Art
Have the children glue the cereal onto a piece of paper.
O-Shaped Cereal O’s
Have the children glue o-shaped cereal on to a piece of paper in the shape of an “o”.
O-Shaped Cereal O’s Coloring Page
Print up an O coloring page and have the children glue the o shapes cereal inside the letter “O.”
Orange Cereal O’s
Make necklaces from the orange cereal o’s
Let the children glue the orange cereal on paper in any shape
Have the children glue it in an O shape
Have the children glue the cereal onto an “O” coloring page
Orange Seeds
Allow the children to glue the seeds from a orange to a piece of paper.
Variation: Let the children glue the seeds to orange paper shaped like an orange.
Variation: Have the children tear bits of white paper to represent the seeds.
Variation: Have the children color a paper plate orange, then glue real seeds or paper seeds to the plate.
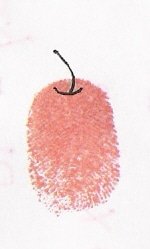
Orange Fingerprints
Supply each child with a piece of white paper and an orange non-toxic stamp pad. Show the child how to make fingerprints on the paper, using only one finger at a time. When finished, add details with a black marker or pen.
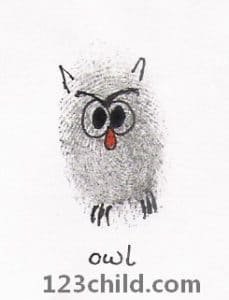
Owl Fingerprints
Supply each child with a piece of white paper and black, grey or brown non-toxic stamp pad. Show the child how to make fingerprints on the paper, using only one finger at a time. When finished, add details with black and orange markers or pens.

Orange Ice Cream Fingerprints
Supply each child with a piece of white paper and an orange non-toxic stamp pad. Show the child how to make fingerprints on the paper, using only one finger at a time. When finished, add details with a black marker or pen.

Fingerprint Bugs
Supply each child with a piece of white paper and an orange non-toxic stamp pad. Show the child how to make fingerprints on the paper, using only one finger at a time. When finished, add legs and antennae with a black pen, or for older children, have them add the legs and antennae.
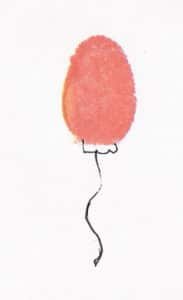
Fingerprint Orange Balloons
Put a small amount of tempera paint in a small shallow container. (The metal lid of a juice bottle works well) Show your child how to dip his/her finger in the paint and make a fingerprint on a piece of paper. (Alternative: Use a non-toxic ink pad) have your child make several fingerprints in several different shades of orange. After the paint dries, have your child draw strings on the fingerprints as if they were balloons. (Alternative: glue on string or yarn.)
Orange “O” Art
Cut out the center of a paper plate to form the letter “o”. Have the children paint a paper plate orange. When dry have the children add orange items like feathers, buttons, orange o cereal, puzzle pieces or orange pieces of paper.
“O” Sponge Prints
You can find already shaped sponges at most art and craft stores or you can make your own. Have your child dip the sponges into orange paint and press on a piece of paper. You can use octopus, owl, “o” or other shaped sponges.
Orange “O” Headbands
Measure your child’s head, and cut a piece of construction paper long enough to create a headband. Glue the paper together so the headband fits snugly on your child’s head but is loose enough to take off easily. Glue the orange items, orange “o” cereal or items that begin with the letter “O” to the headband.
Orange Necklaces
Have the children cut out shapes from orange construction paper. Then, have them use a hole punch to make a hole, so they can thread them onto a piece of yarn. Add orange-colored noodles to the necklace.
“O” Rubbings
Cut “O” shapes from paper doilies or sandpaper. Tape these shapes to the table. Have the children place a piece of thin white paper over the shapes and rub an orange crayon over the shape.
Cookie Cutter Painting
Put a small amount of orange tempera paint in a large shallow container. (A pie tin works well) Show your child how to dip the cookie cutter in the paint and press onto a piece of paper to create a print. Use O-shaped cookie cutters or other cookie cutters that begin with the letter “o”.
Orange Kool-Aid Art
Sprinkle a little dry orange Kool-Aid mix onto a piece of paper. Have your child spray water from a spray bottle onto the paper. For added adventure, you may choose to take your children out into the rain with a piece of paper that has Kool-Aid on it.
“O” Stamping Patterns
Use different “o” shaped rubber stamps with orange ink to create a simple pattern on the top half of a piece of paper. Ask your child to help you recreate the pattern on the bottom half of the paper. Tip: Start with one stamp, and have your child pick which stamp you used. Start slowly and work your way up to more complicated patterns.
“O” Collages
Have the children cut out pictures of “o” or orange items from magazines, and glue them onto a piece of paper for a collage.
Orange Collage
Allow your child to use scraps of orange items to create a collage. They can use orange ribbons, lace, yarn, paper, gift wrap, cellophane, tissue paper and whatever other materials you may have.
“O” or Orange Placemats
Have the children cut out pictures of “O” or orange items from magazines. Have the children glue the pictures onto a piece of paper. Laminate the paper and use for a placemat.
“O” Sticker Art
For a very simple art project, supply the children with a piece of paper and “o” or orange stickers. For younger children this provides an excellent fine motor activity.
Yarn Art 1
Set out a piece of yarn and a shallow container of orange paint . Have the child dip the yarn in one color of paint, and run it across the paper. Use a new piece of string for a different shade of orange.
Yarn Art 2
Set out a piece of yarn and a shallow container of orange paint . Have the child dip the yarn in one color of paint, and run it across the paper. Use a new piece of string for a different shade of orange. Have the children create an O shape with their yarn.
Yarn Art 3
Set out a piece of orange yarn and a shallow container of glue . Have the child dip the yarn in the glue, then form an “o” on their paper. Allow to dry.
O-Shaped Cereal Art
Have the children use the orange Fruit Loops to create a picture.
Orange Water
Add a few drops of orange paint to your water table. This will make your water orange.
Eye Dropper Art
You will need: watered-down, non-toxic red paint, paper, pipettes, and straws. Supply each child with a straw and a piece of paper. Allow the children to use the pipette (or medicine dropper NOT GLASS) to place a small amount of paint onto a piece of paper. Then, have them use the straw to blow the paint around their picture.
Noodle Necklaces
Supply the children with pasta noodles (if you can find Anelli or anellini) that have been dyed orange and yarn. Have the children thread the noodles onto the yarn to make a necklace.
Noodle Art
Supply the children with pasta noodles that have been dyed orange. Have the children glue the noodles onto a piece of paper.
Construction Sign Art
Have the children color pre-cut signs orange.
Alt. Have them paint the signs orange.
Creating Orange 1
Have the children mix yellow and red water to create orange.
Creating Orange 2
You can place two tablespoons of yellow paint and one tablespoon red paint (kids’ nontoxic paint) into a Ziplock bag. Seal the bag and tape shut. Have the children squish the paint around until it is orange.
Orange Prints
Cut an orange in half and have the children dip in paint and press onto paper for orange prints.
Orange Construction Signs
Print up some construction signs on orange paper and place them in your block area. Encourage children to wear hard hats when building.
Orange Shaving Cream Art
Add a few drops of red and yellow (2 yellow to 1 red) food coloring to shaving cream. Mix a little. Have the children use this to paint with.
Orange Punches Collage
Have the children glue orange shapes onto a piece of paper.
Paper Plate Octopus
Have your child cut a paper plate in half. Have the child draw eyes on the plate, then glue on eight pieces of crepe paper to the bottom as arms. When dry hang by a window to see the octopus “swim”.
Easy Octopus Art
Draw seven 5 1/2-inch lines up from the long side of a piece of construction paper. Have the child cut along the lines to make arms, and roll the paper, and tape the sides of the body together. Have your child bend the arms outwards, and stick on sticker eyes.
Pipe Cleaner Octopus
Cut a toilet paper tube in half. Have your child tape eight pipe cleaners onto the tube for legs. Use a marker for the eyes.
Ocean Scene
This one is so simple. Buy some fish stickers.. have your child put the stickers on a piece of blue paper for an ocean scene.
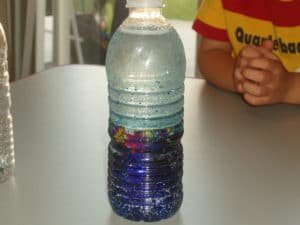
Ocean Bottle
Clean out an empty plastic pop bottle. Add water, blue food coloring, and glitter, and maybe a few pebbles. Seal the bottle closed using a little hot glue, allow to completely dry before the children can play with it. Tip the bottle back and forth. roll the bottle on the floor.
Christmas Ornaments 1
Decorate canning lids with string, ribbon, sequins, lace, and odds and ends. Glue a pipe cleaner to the back and hang on your tree.
Christmas Ornaments 2
Have the children decorate really Christmas ornaments with string, ribbons, lace, sequins and odds and end. Allow to dry and send home for a great gift.
Octopus Streamers
Have the child make an octopus by knotting eight pieces of crepe paper together. Play some music and have your child do an octopus dance.
Hand Print Octopus
Paint both of the child’s palms and fingers, (but not the thumbs) the same color. Have the child make one handprint with their fingers spread far apart. Make the second handprint over the first, lining up the palms, but placing the fingers in the spaces between the first set of fingers. After the paint has dried, the children can add facial features with a marker or black pen.
Olive Painting
Trace the shape of the lid of a container onto a white piece of paper. Cut out the shape so that it is smaller than the inside of the lid. Place a small amount of paint on the inside of the lid, then place the paper on the inside of the lid. Pour a small amount of paint inside of the bowl and place a few olives inside the bowl. Have your child turn the bowl upside down and shake. When finished remove the paper and allow to dry. (alt, use octagon or “o” shaped paper)
Octagon Art
Cut out an octagon shape for each child for them to decorate. You can use orange materials, the reinforcing circle stickers shaped like “o”s, o-shaped cereal, or anything else.
Fingerprint Oak Tree
Use brown ink along the side of the child’s hand to make the tree trunk. Use green ink on the child’s thumb to make as many leaves as the child wants. Use brown ink on the child’s pinky finger to make the acorns.
Eraser Oak Tree
Use brown ink along the side of the child’s hand to make the tree trunk. Use green ink on the child’s thumb to make as many leaves as the child wants. Use brown ink on the eraser of a pencil to make the acorns.
Oak Trees
Cut out a piece of green paper to fit on top of the toilet paper tube. Cut two slits in the toilet paper tube about 1/2 inch down.
Some decoration options include:
- Have your child decorate the paper with a brown marker to make acorns.
- Have your child press one finger into a brown ink pad and press onto the green paper to make acorns.
- Have your child press the eraser of a pencil into a brown ink pad and press onto the green paper to make acorns.
- Have your child color the paper with markers or crayons.
Slide the paper onto the tube.
Oak Leaf Collages
Cut out different leaf shapes out of fall colors and have the children glue the shapes onto another piece of paper.
Oak Leaf Rubbings
Have the child place a leaf under a piece of paper, and rub the paper with crayon, and the leaf shape will appear. This works much better with green leaves.
Oak Leaf Prints
Obtain a leaf for each child. Have the child paint the vein side of the leaf. Press the leaf onto a piece of paper to create a leaf print.
Oak Leaf Hands
Trace your child’s hand onto a fall color of construction paper, and cut it out to make it look like a maple leaf.
Oak Leaf Tree
Use brown construction paper for the trunk of the tree, and tape up fall leaves to the wall to make a huge fall tree in your classroom.
Oak Leaf Painting
Have the children paint, using leaves as paintbrushes.
Oak Leaf People
Have the children glue a leaf on a piece of paper, and draw legs, arms, and a head to create a person.
Oak Leaf Mobile
Have the children attach leaves to a hanger with different lengths of string to create a mobile. Hang around the classroom.
Oatmeal Art
Add a little oatmeal to paint to add some texture. Have the children use the paint to create a picture.
Ocean in a Bottle
You need an empty clear soda bottle, a funnel, water, blue food coloring, cooking oil.
Fill 1/3 of the bottle with water. Add a few drops of blue food coloring. Gently mix the food coloring and the water by gently tilting the bottle back and forth a few times. Fill the rest of the bottle with the cooking oil. Put the lid on the bottle tightly. You can seal the lid with a hot glue gun if you wish. Have the children tilt the bottle back and forth and observe how the water and oil do not mix. Alt. You can add a wide variety of items to the water, like glitter, plastic toys (that fit in the bottle), different colors etc.
Ocean Scene
Mix a little blue paint with shaving cream. Have the children work together to paint a large piece of butcher paper with the shaving cream/paint mixture. After it is dry, you can attach some ocean animals, like an octopus, or jellyfish.
Ovals
Have children paint or color ovals orange.
“O” Prints
Set out a paper plate with several different paints poured onto it. Supply the children with straws, cardboard tubes, or other circular items. Have the children dip the object in the paint then press it onto a piece of paper to make an “O” shape.
Math, Science, and Games
Octopus Color Changes
Discuss with your child how an octopus will change colors to blend with it’s surroundings. Cut four or five different colored octopus from construction paper. Set out four or five of matching sheets of construction paper. Ask your child to match the octopus with it’s background.

O-Shaped Cereal Fruit Loops Math
Place the numbers one thorugh six on six small post it papers. Place these papers in the bottom of each muffin tin hole. Have the children place one Fruit Loop in the one space and two in the two and so on.

O-Shaped Cereal Fruit Loops Sort
Have the children sort the Fruit Loops by color in a muffin tin. To make it easier you can cut construction paper circles from the same color as the cereal to place in the bottom of each hole.
Comparing Oranges
Have the children compare and contrast a nectarine and an orange. Create a Venn diagram to show the similarities and differences.
Owl Sizing
Find different pictures of owls and laminate them. Have the children arrange the birds according to size.
Owl Sorting
Find pictures of owls and laminate them. Have the children sort the owls (color, where they are, kind, etc.).
Find Something that Begins with “O”
Have the children find something in the room that begins with the letter “O” and have each child bring it to circle time. Have each child tell the class what they have found.
Find Something Orange
Have the children find something in the room that is orange and have each child bring it to circle time. Have each child tell the class what they have found.
Orange Chat
Have the children name as many things they can that are orange. Write down their list.
Letter “O” Chat
Have the children name as many things that they can that begin with the letter “o”. Write down their list.
“O” Picture Matching
Find stickers of “o” or orange items. Place 2 identical stickers on the left and right sides of an index card. Cut the index in half, cut in a jig-jag form. Use a highlighter to highlight the edges. Do this with many different stickers. Have the child match the stickers, and line up the two halves of the index card.
“O” Memory
Find stickers of “o” or orange items. Place 2 identical stickers on the left and right sides of an index card. Cut the index in half, cut the index card in half. You can use these cards to play memory.
Letter “O” or Orange Sort
Draw different kinds of “o” or orange items and have the children sort the cards. Or you can cut out pictures and glue each onto a separate piece of paper. Have the children sort the items.
Orange Survey
Ask the children “Do you like oranges?” Graph the results.
Orange Lacing Cards
Cut orange poster board into shapes and punch holes around the edges. Then let your child lace yarn or a shoestring into the cards.
Orange Play-Doh
Have the children make a variety of items with orange Play-Doh.
Orange Jar 1
For older children. Fill a small jar with similar orange items. Ask each child to guess how many orange items are in the jar. For younger children, limit the number of orange items to less than ten. Record each child’s guess. Count the orange items.
Orange Jar 2
Provide three identical jars with pre-counted red items of 20, 30, and 40. Label these jars 20, 30 and 40. Place 20 to 40 red items in a fourth identical jar. Allow the children to examine all four jars before they guess. Record the children’s approximations. Count the orange items.
Orange Glasses
Obtain orange cellophane wrap and many toilet paper rolls. Apply a square of the cellophane wrap to the end of the toilet paper roll and secure with a rubber band or masking tape. Each child should have one. Have the children look through the tube to see what everything looks like. You could also have five of these set up in your science area for the children to use, or bind two of the same color for binoculars.
Orange Goop
Mix 2 cups water with a little orange food coloring, add 6 cups of cornflour/cornstarch to make goop.
Mixing Orange-Colored Water
Materials: water, red food coloring, plastic eyedroppers or pipettes, white plastic egg cartons
Fill three of the spaced in your egg carton with water. Add a couple of drops of red to one, many drops of yellow to another, and none in the last. Show the children how to use the eyedropper or the pipette to move the water from one spot to another. Let them experiment with mixing the colors.
How Many Orange Seeds?
Have the children guess how many seeds will be in your orange. Record their answers. Dissect the orange and count.
Parts of an Orange
Talk about the parts of an orange. What shape is it? How does it feel on the outside? How is the inside different from the outside?
Organize It
Provide the children with a variety of materials to sort and organize.
Oval Sort
Cut out many different oval shapes from construction paper. Have the children sort the ovals by color or size.
Oak Trees Throughout the Year
Show pictures of an oak tree in the spring, summer, fall and winter. Ask the children what season it is based on the picture. Talk about the leaves on the tree for each season.
Orange Neck Relay
Before you begin, you will need to mark a start and finish line. Divide your group into 3 or 4 equal teams. Have one orange for each group. Have the children in each team line up behind the start line. The first person in line will put the orange under their neck. Then, when you say go, then children will run to the finish line and back to the start to pass off the orange to the next in line. That person will then run to the finish line and back, and this will continue until each person on the team has had a turn. The first team to have their final person cross the finish line wins.
Optional rules:
No one may use their hands unless they drop the orange.
If a child drops the orange they must return to the start line.
Have all the children run at once with no teams.
Orange Neck Relay
Divide your group into 3 or 4 equal teams. Have one orange for each group. Have the children in each team line up. The first person in line will put the orange under their neck. Then when you say “go” the first child will pass the orange to the person behind them without using their hands. The second child must hold the orange under their neck and pass it again until the orange makes it to the end of the line.
Optional Rules:
If a child drops the orange, the orange goes back to the first person in line.
Have all the children line up in one line and time how long it takes to pass it.
Orange Passing
Played like “Hot Potato”
The children sit in a circle. Have the children pass an orange around the circle while you chant:
Orange, orange, orange and sweet,
Orange, orange, fun to eat,
Who will get caught we will see,
We will count, one, two THREE!!!
Whoever is holding the orange when you say three goes in the center for one turn.
Play again, then the next person that is holding the orange replaces the first child in the middle.
Sand and Water Table Ideas
- Add a few drops of orange food coloring to the water
- Add soap and a few drops of orange food coloring to the water
- Add orange ice cubes to the water
- Use orange rice (add food coloring to the rice, mix and let dry)
- Use orange pasta (add food coloring to the pasta, mix and let dry)
- Add orange plastic blocks to the sand or water
- Add octopus shapes to the water table
- Add ocean animals to the water table
Songs and Group Activities
Color Song
Suzie is wearing orange today
orange today, orange today,
Suzie is wearing orange today
All day long
(Substitute “Suzie” with the name of a child in your class, and red for the color that child is wearing) Repeat the song twice and let the child dance during the song. Have the other children sing and clap along).
Color Jump Song
If you’re wearing orange then
Jump up and Down,
Jump up and Down,
Jump up and Down,
If you’re wearing orange then
Jump up and Down,
Now sit back down.
My Octopus Song
Sung to “Three Blind Mice”
Octopus, Octopus
In the Sea, In the Sea
To swim they use all 8 of their arms
Their color changes to hide them from harm
They live in the sea, not on a farm
The Octopus
Color Hop
Cut O shapes from orange paper. Use contact paper to attach these to the floor. Place them in a manner where the children can hop from one shape to the next easily.
Green, Green, Orange!
Played like “Duck, Duck, Goose” except the children say “Green, Green, Orange!”
Orange Says
Played just like “Simon Say” except the teacher says “Orange Says.”
Orange Blanket Fun
Place a soft orange object (bean bag or soft stuffed toy) on a blanket or parachute. Have the children shake the blanket till the object flies off.
Orange Obstacle Course
Set out some orange cones to be a part of an obstacle course. Try to use as many orange things as possible as part of the course.
Fishing
Cut out several o-shapes from orange construction paper. Write several numbers on them. Have them laminated. Then place a paper clip on each shape. Make a fishing pole out of a dowel or pencil, string and a magnet. Place the shapes on the floor and have the children sit in chairs around the shapes. (This may work better with a few fishing poles.) Have the children try to catch a shape with the fishing pole. Then, when they catch one.. show it to them and ask what number it is.
Variation: Ask the child if they can catch the “1”
Octo – Octa chat
Talk about how the prefixes octo and octa mean “8”. An octopus has eight legs and an octagon has eight sides. Have pictures of each and count the legs and sides together.
Oak Leaf Crunching 1
Place leaves in the sand and water table. Encourage the children to examine the oak leaves and crunch them in their hands.
Oak Leaf Crunching 2
Place dry leaves on the floor or go outside where there are leaves and let the children crunch the leaves with their feet.
Jump Over the Ocean
Cut out shapes from blue paper or newspaper (you can have the children paint it blue). They need to be small enough for the children to be able to hop over. Then set them on the floor and ask the children to take turns hopping over the ocean.
Oval Hop
Cut out many different oval shapes and affix them to the floor with contact paper. Have the children hop from one shape to the next.
“O” Musical Shapes
Cut out many different shapes that begin with the letter O. Octopus, owl, oval, O’s, otter, one, oar, onion etc. Affix these shapes to the floor with contact paper. Play some music and have the children walk about the shapes. When the music stops everyone finds a shape to stand on. It is better to have more shapes than children. Ask who is on an orange shape? Who is on the letter “O.”
Snacks
General Snack Ideas
- Serve oranges or peaches
- Serve orange fruit snacks
- Serve carrots
- Serve orange milk
- Add a few drops of orange food coloring to milk
- Serve orange juice
- Try orange sherbet for a treat
Olive Taste Test
Have the children taste a couple of different kinds of olives. Have the children vote on which they like the best (or none). Graph the results.
Make Orange Ice Cream
(Makes 2 servings)
Ingredients
1/2 c. milk
1 Tb. white sugar
1/4 t. vanilla
Orange food coloring
Add a few drops of orange food coloring (or mix 2 yellow to one red) to the milk. The more you add the more orange the ice cream will be. Place all ingredients into a pint-sized Freezer baggie and seal. In a gallon size Freezer baggie fill 1/2 way with ice and add 6 T. of rock salt on top of ice Place pint size baggie inside gallon size baggie and seal tight! Have the children shake the bags. It will become a solid in about 4 minutes.
Taste Test
Have the children try a variety of orange kool aid vs orange juice. Ask them which they like the best. Record the results.
Hot Dog Octopus
Cut slits into a hot dog 2/3’s of the way up. Use a toothpick to poke two eyes near the top. Put the hot dog in a pan of boiling water.